Mid-century Modern House Numbers Tutorial - Using Paint Sticks!
7:30:00 AM |
One such thing bugging me was the house numbers; now, admittedly, they never would have looked like the ones I put up. But, I think they give the house a bit of flair.
I started scouring Pinterest in search of something cool but somewhat period appropriate, and came upon this tutorial by Michelle of 4 MEN 1 lady. In her tutorial she creates a vertical house number plaque; I had limited space between my house light and mailbox and was forced to modify her tutorial to a horizontal orientation.
I have made some additions and modifications to her tutorial, and thought I would share my spin on her take. I hope you enjoy my post, and if you end up making one, make sure to leave a comment with a link to a picture of your house numbers, because I'd love to see it!
SPECIAL NOTE: Home Depot has since started printing/embossing on both sides of their sticks - one side has their logo, the other, a ruler. Check out these Made in the USA paint sticks on Amazon as an alternative!
Materials:
(based on a 4 - number address plate; Amazon affiliate links below to the products I used)
- 2x6 Pressure treated piece of lumber, cut to about 24" long (you can have the hardware store cut this for you)
- About 10 paint sticks - don't want to head to the hardware store? Check out these Made in the USA sticks on Amazon
- Minwax Mahogany Gel Stain (I just used interior stain and sealed it) and foam brushes
- Thompson's WaterSeal spray
- Stand-off/floating house numbers (I used these ones)
- Silicone caulk
- Construction adhesive/No-nails
- Keyhole hangers
- Screws and Washers
Equipment:
Instructions:
- mitre saw, hand saw, or some sort of wood-cutting device
- power drill and wood bits
- caulk gun if you don't purchase the smaller sized squeezable tubes of construction adhesive and caulk
- pencil and tape measure or ruler
Instructions:
1. Stain your paint sticks.
The original tutorial by Michelle of 4 MEN 1 lady had you stain both sides of the stick; I'm lazy and impatient, so I just stained the fronts and edges. I used a foam brush to apply the gel stain, and only applied 1 light coat.
Note that the heavier you apply the stain, the darker your sticks will be, but you'll also 'lose' more of the grain markings. If you want to accent the grains, keep it light with the coat(s).
2. Cut your sticks to size.
Dry fit your sticks, staggering the seams where two sticks meet.
Note that the heavier you apply the stain, the darker your sticks will be, but you'll also 'lose' more of the grain markings. If you want to accent the grains, keep it light with the coat(s).
2. Cut your sticks to size.
Dry fit your sticks, staggering the seams where two sticks meet.
 |

When cutting your paint sticks, mark them and cut them upside down.
This will eliminate much of the damage and splintering that your chop saw may cause.
3. Attach your sticks with the construction adhesive.
I used Loctite's Construction Adhesive, and I've used Liquid Nails in the past and had great results with it. I bought a large tube, since I have a caulk gun kicking around the house and I knew I'd need the adhesive for some other projects around the house. It comes in smaller, more manageable tubes if this is the only project you're buying it for.

Be careful not to over do it with the adhesive; use one of your scrap pieces of paint sticks to butter the back of each stick you're gluing down.
This'll minimize any excess glue seeping up between the sticks.
 |
4. Touch up any chips.
You'll have a few chips to touch up from cutting your sticks, and you'll need to stain the cut ends to make them more weather resistant, as well as stain the edges of the backerboard:
 |
5. Seal your backer board.
I used Thompson's WaterSeal. Make sure to read the instructions on the can, and let the backer board dry for the appropriate time. This'll help increase the longevity of your new numbers by making it more weather-proof. Make sure to seal the backside and edges of your board, too, since they'll be in contact with the elements as well.
 |
6. Attach your Hangers
Draw a straight, square line across the top of the backside of your board - attach your keyhole hooks using the line as a guide.
 |

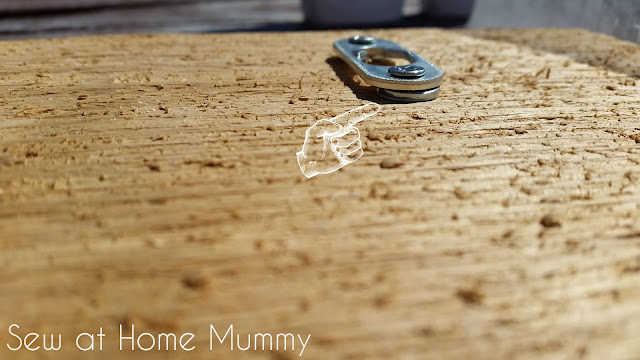
When placing your key-hole hangers on the back of your board, add a washer or two as a spacer behind the hangers.
This will ensure that you'll have enough space to accommodate your mounting screws when you go to hang it. (See picture below)
 |
7. Attach your numbers.
I used the stand-off or 'floating' MCM looking numbers from The Hillman Group (here's the Amazon link).
 |
I wanted the modern look that these numbers from Rejuvenation give, but without the price tag. For about $6 a piece, these were a bargain!
Now, these were easy to use, however, I do have a few comments to make about them:
- the templates supplied are a little 'off'.
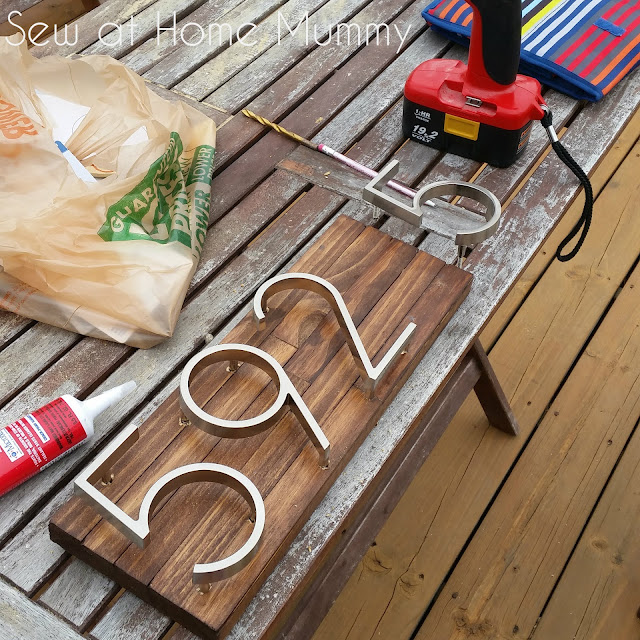
Each number comes with a cardboard template which you use to determine where you're going to drill your holes. I found that these were 'off' - my suggestion is to dry fit your numbers, then manually mark your holes. Each number has 3 stand-offs you'll need to drill for. I marked each hole place, drilled one, aligned my number, checked my marks, drilled the next hole, checked my marks, etc. Took a while, but it was worth it.
- the bit sizes recommended for drilling are a bit big.
The instructions state that you drill a 1/8" pilot hole, followed by a 1/4" finishing hole, then place your silicone caulk in the holes, and drop your numbers in. I found the holes to be a bit big - if I were to do this again, I'd drop the second bit size down to 15/64" or even 7/32". I think these sized holes would still give you plenty of room for caulk and offer maybe a bit more stability.
- You'll need to touch up the drilled holes a bit with some stain (I should have done this before I slotted the numbers in, but a Q-tip worked well for the stain touch ups around the standoffs).
And, voila!
 |
If you're interested in picking up a mailbox similar to mine (the one I purchased is discontinued and no longer available,) here are 4 similar options on Amazon* with that modern mid-century feel:
 |
top to bottom, left to right: |
Happy DIYing!
 |


10 comments
These are so beautiful!
ReplyDeleteWhat is the source for the house numbers you bought?
ReplyDeleteHi there!
DeleteHere's the house numbers I bought on Amazon: Floating House Numbers*
Where did you get your light and mailbox?
ReplyDeleteHi Janice!
DeleteThe light has since been discontinued from Menards - and the mailbox I bought on eBay!
Wonderful idea.. Thanks so much!
ReplyDeletehow did you mount your finished product to brick wall? I have brick and am concerned about how to do that.
ReplyDeleteHi Natalee!
DeleteI installed my hardware in the mortar, not the brick.
You'll need a masonry drill bit to drill your holes. If you don't have access to a masonry drill bit in the appropriate size, a kit like {this} would do the job for you - it includes the anchors, screws and bit you would need to complete the project.
I should note that, because I already have a masonry bit set and a ton of anchors, I just needed screws. I ended up going with concrete specific screws called Tapcons, like these - they are coated to resist the leaching concrete inflicts on metal. I find that they just last longer in the elements.
TIP: when picking screw types to mount your board on, pick a Philips flat head style - they are more likely than any other round or hexie shaped screw head to fit in the keyhole hook of the hanger.
Thanks for your questions! I hope this helps :)
Hi, I'm about to attempt this project for a Christmas gift, but the 2x6 seems too thick after I bought it. When I looked at the pictures of the piece of wood you used, it looks thinner. Can you please confirm the dimensions of the wood you used again? Thanks!
ReplyDeleteHi Adam!
DeleteI did in fact use a 2x6 for the backing! I hope this helps, and good luck with your project!
I ♥ to hear from you!
Thank you for taking the time to leave a comment or for asking me a question. Rather email me? Reach out at sewathomemummy@gmail.com.
I like to email everyone back when they've commented - so if you're a no-reply blogger, make sure to leave your email address in your comment so I can share the love back atcha!