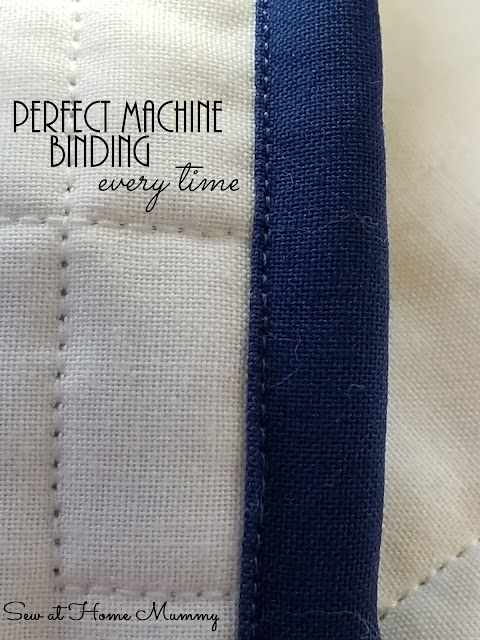
Machine Binding a Quilt: My Tips and Tricks for using a Blind Hem foot
6:30:00 AMI thought I'd write up a tips and tricks / tutorial for how I machine bind my quilts.
I usually float between this technique and another, where I use a tiny zig-zag stitch, but today I'll be focusing on a straight-stitch, machine bound technique using a Blind Hem foot. I've included Amazon affiliate links below for your reference (and pajammy-wearing, couch-shopping pleasure!).
 |
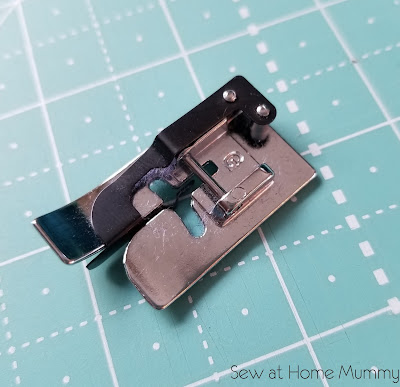
Here is an example of a blind hem foot:
 |
For Janome owners, this foot is labeled "G".
For Bernina owners, this foot is labeled "5".
These feet have a metal or plastic guard located in the gap between the toes of the foot which acts as a guide while you're sewing. The guide may have a screw adjustment, be fixed, or screw on and off as needed.
Generally speaking (and depending on your machine make), they are not very expensive - you can pick one up at your local dealer or on Amazon for less than $15 or $20. Here are some examples:
I like this binding technique; it's quick, easy, and really durable. 99% of my quilts are functional and not show quilts so I'm always thinking about longevity and the quilt making it through a lifetime of washing machine cycles.
SUPPLIES:
(*aff links to Amazon below)- Binding (I make folded non-bias binding, at 2.25")
- Blind Hem Foot* (I use a Janome 'G' foot on my Janome 6500 and 6700)
- SPOOL THREAD: Lightweight thread, coordinating with binding (I recommend an Aurifil 50wt*, here I'm using color #2775)
- BOBBIN THREAD: Lightweight thread, coordinating with the backing (I recommend an Aurifil 50wt or 60wt*, here I'm using color #2775)
So here's what I do -
- Prepare your binding how you normally would. I use folded 2.25" strips for my binding, joined on the bias. If I have left over jelly roll strips I'll use these as well (at 2.5") and I don't bother trimming them. Note that if your quilt is bulkier (wool batting or a minky backing) use a 2.5" strip for your binding.
- Attach your binding to the BACK side of your quilt sandwich using a 0.25" seam allowance. Depending on the thickness of the quilt (if I used a wool batting or minky backing) I use a regular quarter seam foot (thin quilt) or a walking foot with an adjusted needle position (thick quilt).

- (optional) Press your binding away from the quilt, from the back side of the quilt. I skip this part; personally, I find it easier to manipulate the binding in the next steps if it hasn't been pressed away, but I know of some who machine bind and like to press at this stage. Up to you!
- Flip your quilt over, right side up, and begin folding the binding to the front, overlapping your initial 0.25" seam with the folded edge of the binding.

- Pin the first 5 or 6 inches of the binding in place. Note - I use pins for this binding technique. I find that with this style of binding, using clips allows the binding to shift too much, and you're more likely to get a wobbly line of stitching on the backside of your quilt.
- Fold corners so that while sewing, you'll be sewing over the fold, not into it. This'll ensure your corners don't bunch on the underside.

- Using your blind hem foot, sew your binding from the front side of your quilt, with the seam guide butted up against the fold where the binding meets your quilt, like so:
TIP: use your favorite seam ripper to help you guide and keep the binding in the right spot as it goes under the presser foot.
- Play with your needle position so that
- your needle doesn't hit your foot at all
- your seam will land on your binding in a position that's visually appealing to you.
- That's it!
 Sew at Home Mummy Tip:
in your bobbin use a lightweight thread which coordinates to the backside of your quilt. I always use a 50 or 60wt Aurifil* cotton thread.
 |
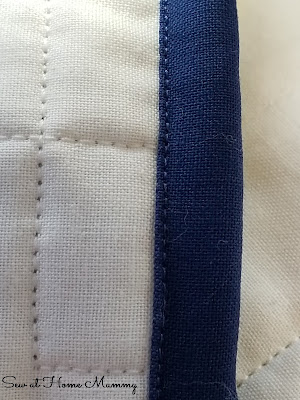
| Front of the quilt |
 |
| backside of quilt |
Note that when folding the binding over to the front side, if you align the folded edge of the binding just past the stitch line of the binding to the quilt, your stitch line will be much closer to the 'ditch' of the underside binding/quilt seam.
I hope you enjoyed this tutorial today! I really like this technique, I hope you will too!
Please note that this post contains affiliate links (at no extra cost to you) to Amazon.com. For more information, please visit my Disclosures and Policies page here.
 |


2 comments
Thanks for sharing. I might have to give this a try.
ReplyDeleteYou can also glue that binding down before sewing it to hold in place.
ReplyDeleteI ♥ to hear from you!
Thank you for taking the time to leave a comment or for asking me a question. Rather email me? Reach out at sewathomemummy@gmail.com.
I like to email everyone back when they've commented - so if you're a no-reply blogger, make sure to leave your email address in your comment so I can share the love back atcha!