
DIY Fabric Cutting and Craft Table - IKEA RAST Hack
10:32:00 AM
I have been very slowly plugging away at small projects around my sewing space, and one of the projects needing to be crossed off my list has been a new cutting table.
I wanted something with storage for my cutting mat(s) and rulers - somewhere where they could safely lay flat and out of the way.

I needed somewhere to store my smaller templates and rulers...I wanted all of this BUT I didn't (read: couldn't) spend a ton of money on the project.
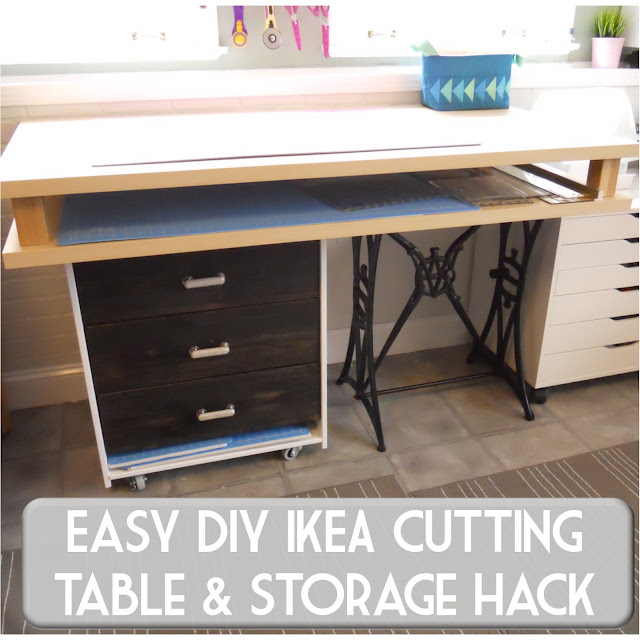
So here's my cheap IKEA RAST hack!


The trick here is going to be attaching your top piece on the bottom at such a height where it makes the dresser sit level with your cast iron treadle base (once your casters are attached). The height of your particular treadle base will determine where on the dresser bottom you place the dresser top piece, if that makes sense.
2) Using #8 1/2" wood screws, attach 4 casters to the underside of the dresser about 1 1/2" from each corner.

3) Stain, paint, and/or seal your RAST. I used Minwax stain in Ebony - just one coat - on the dresser drawer fronts, sealed with a Polyurethane in Satin, and a high gloss white trim paint on the rest of the dresser I had left over from painting the windows in the basement last summer.

Instead of using the knobs supplied, I filled the holes pre-drilled by IKEA with this product (affiliate link from Amazon.com) and then put these knobs on from Home Depot.
4) Attach the four ADILS leg brackets to the underside corners to one of the LINNMON table tops. Screw the four BURFJORD furniture legs into the brackets ensuring their final resting spots are square with the edge of the corners of the table top.
5) Place the two table tops on each other, checking to make sure the edges are level with each other; attach using 3" screws (I had some decking screws left over from a project last year I used) through the underside of the lower table top down the center of each furniture leg.

6) Flip your table top and it's time to mock-up where you'll want your treadle base and RAST base to sit underneath. Get them both positioned where you'd like, then, to the underside right side of the table top where your treadle base will attach, attach the RAST backing using Gorilla woodglue (on Amazon) and 1/2" screws. This will provide more support (something more for the heavy treadle base to 'bite' into when you bolt it to the table top - especially since these tops are hollow and these treadle bases are heavy cast iron)

7) On the left side of the table, first determine where your RAST dresser will sit as a table leg; place plywood sheet on top of RAST, leaving overhang all the way around, and affix to RAST from above using screws attaching to RAST frame. Slide RAST back in place and screw to table top from underneath using 1/2" screws and Gorilla wood glue.
You are DONE!

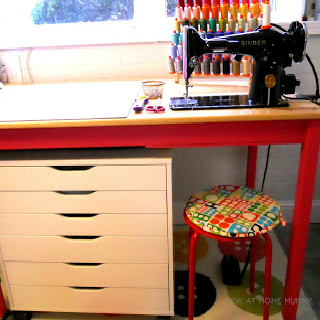
I love my table. My rulers slide nicely out of the way now when I'm wrangling large quilts, and my mat(s) store nicely under my table when I need the space to baste or work on photographing, pinning, crafting, wrapping presents, or more.

And, I love that I lift the treadle base side and because the RAST is on casters I can move the table by myself all over the room, wherever I like.

The drawers are awesome and work well for all of my rulers and templates, and free up valuable drawer and table space elsewhere. And the little cubby space underneath worked out super well for my June Tailor Cut N' Press mats - they slide right in.
My goal is to save up for a larger, non-standard sized cutting mat (something bigger than 24x36) that fills the majority of the table but is just able to squeek between those support pillars in the storage area (i.e. so I can still slide it away if I want to). Future me.

Ahh. Super happy with this one. I hope you like this post, too, and consider making it or something like it for your sewing space as well! If you do, make sure to let me know, I'd love to hear about it.
Make sure to check out my other hacks for your sewing studio:


Happy Hacking!


I wanted something with storage for my cutting mat(s) and rulers - somewhere where they could safely lay flat and out of the way.

I needed somewhere to store my smaller templates and rulers...I wanted all of this BUT I didn't (read: couldn't) spend a ton of money on the project.
So here's my cheap IKEA RAST hack!
Please note I've included a list of the supplies I've used and included affiliate links to Amazon.com and other approved sponsor sites in this post for your reference. For more information, please visit my Disclosure Statement and Advertising Policies page.
Supplies (affiliate links included below):
- (4) 2" swivel locking casters
- #8 1/2" wood screws
- 2' x 4' x ¼" plywood
- Stain (I had Minwax in Ebony, and Polyurethane in Satin on hand) and Valspar high gloss bright white latex paint
- Elmer's wood filler
- Gorilla Wood Glue
- Vintage cast iron sewing machine treadle base (check garage and estate sales, auction sites)
- IKEA RAST dresser
- (2) LINNMON table tops (59" x 29.5")
- (4) ADILS Leg brackets
- (1) BURFJORD package of furniture legs
- Dresser knobs (optional)
Directions:
1) Put your RAST dresser together - BUT - instead of putting the top on the top, you're going to use it for your base, and, the kick-plate for the bottom front you'll use at a 90 degree angle at the top of the dresser, using the holes originally meant for the dresser top. Use hardware supplied. DO NOT attach the back piece to the dresser, set aside for later.

The trick here is going to be attaching your top piece on the bottom at such a height where it makes the dresser sit level with your cast iron treadle base (once your casters are attached). The height of your particular treadle base will determine where on the dresser bottom you place the dresser top piece, if that makes sense.
2) Using #8 1/2" wood screws, attach 4 casters to the underside of the dresser about 1 1/2" from each corner.

3) Stain, paint, and/or seal your RAST. I used Minwax stain in Ebony - just one coat - on the dresser drawer fronts, sealed with a Polyurethane in Satin, and a high gloss white trim paint on the rest of the dresser I had left over from painting the windows in the basement last summer.

Instead of using the knobs supplied, I filled the holes pre-drilled by IKEA with this product (affiliate link from Amazon.com) and then put these knobs on from Home Depot.
4) Attach the four ADILS leg brackets to the underside corners to one of the LINNMON table tops. Screw the four BURFJORD furniture legs into the brackets ensuring their final resting spots are square with the edge of the corners of the table top.
5) Place the two table tops on each other, checking to make sure the edges are level with each other; attach using 3" screws (I had some decking screws left over from a project last year I used) through the underside of the lower table top down the center of each furniture leg.

6) Flip your table top and it's time to mock-up where you'll want your treadle base and RAST base to sit underneath. Get them both positioned where you'd like, then, to the underside right side of the table top where your treadle base will attach, attach the RAST backing using Gorilla woodglue (on Amazon) and 1/2" screws. This will provide more support (something more for the heavy treadle base to 'bite' into when you bolt it to the table top - especially since these tops are hollow and these treadle bases are heavy cast iron)

7) On the left side of the table, first determine where your RAST dresser will sit as a table leg; place plywood sheet on top of RAST, leaving overhang all the way around, and affix to RAST from above using screws attaching to RAST frame. Slide RAST back in place and screw to table top from underneath using 1/2" screws and Gorilla wood glue.
You are DONE!

I love my table. My rulers slide nicely out of the way now when I'm wrangling large quilts, and my mat(s) store nicely under my table when I need the space to baste or work on photographing, pinning, crafting, wrapping presents, or more.

And, I love that I lift the treadle base side and because the RAST is on casters I can move the table by myself all over the room, wherever I like.

The drawers are awesome and work well for all of my rulers and templates, and free up valuable drawer and table space elsewhere. And the little cubby space underneath worked out super well for my June Tailor Cut N' Press
mats - they slide right in.My goal is to save up for a larger, non-standard sized cutting mat (something bigger than 24x36) that fills the majority of the table but is just able to squeek between those support pillars in the storage area (i.e. so I can still slide it away if I want to). Future me.

Ahh. Super happy with this one. I hope you like this post, too, and consider making it or something like it for your sewing space as well! If you do, make sure to let me know, I'd love to hear about it.
Make sure to check out my other hacks for your sewing studio:
How to save money when buying a sewing machine
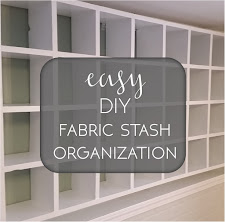
Easily Build a Fat Quarter and Fabric Storage System
Easy, cheap DIY Roll-away Quilting Design Wall
IKEA INGO Dining Table Hack for a Hinged Singer
.
Happy Hacking!


0 comments
I ♥ to hear from you!
Thank you for taking the time to leave a comment or for asking me a question. Rather email me? Reach out at sewathomemummy@gmail.com.
I like to email everyone back when they've commented - so if you're a no-reply blogger, make sure to leave your email address in your comment so I can share the love back atcha!