
Beautify your Blog: week 2 - Blog Layouts & Backgrounds
6:00:00 AMHi all and welcome back to the Beautify your Blog series here at Sew at Home Mummy.

This week we'll be covering layouts for your Simple templated Blogger Blog.
If you're just coming across this series for the first time today, please see this post for the series disclosure and the first few lessons (which you'll want to watch and complete before starting this).
Okay! Let's get started.
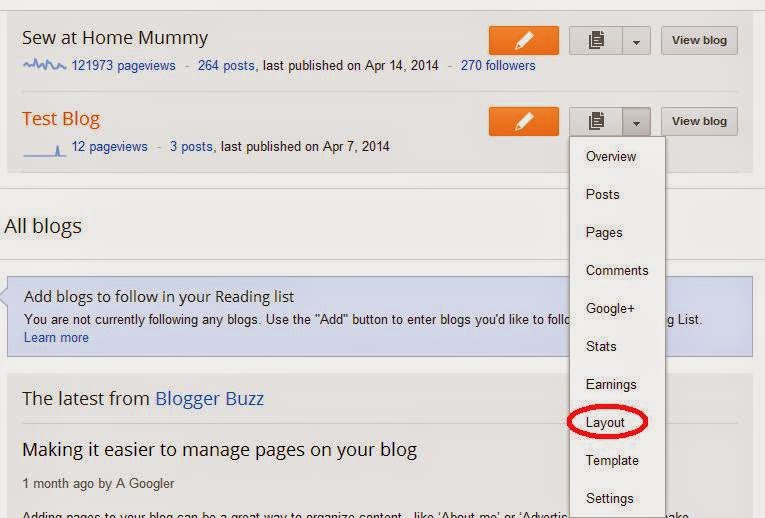
1. Head over to your Blogger.com homepage. Select your test/template blog.
2. Click in the dropdown menu beside your blog's name, click "Layout"
3. Click on the "Template Designer" link at top right.

Blog Layout:
3. Click on "Layout" in the drop left menu; this is what you'll see:

Keep in mind: if you choose to have sidebars on both the left and right side of your blog, you'll drastically limit your post widths - which in some instances can make your blog seem a bit more 'squished' and a little more cluttered, depending on the content of your sidebars. It will also limit how large you can make your photos within your posts (and a nice sized photo is blog eye candy in my opinion).
The 'Footer' layout determines what the very bottom of your blog will look like. This is completely personal a choice.
Once you have a layout you're happy with, click "Apply to Blog" (circled in red)
Blog Margins/Size:
4. Next, click on "Adjust Widths" in the left sidebar, just above "Layout"
- I suggest you set your "Entire blog" width to between 1100-1200px wide. This will ensure that your blog and headers all display correctly on any screen or browser your readers may use to read your blog. Anything wider and your sidebar and header risk being cut-off (people would need to scroll over to see it all, which is annoying) and anything smaller and your blog will appear really squished.

- As for the sidebar, I suggest if you're planning on having a 2-column section in your sidebar that you set your sidebar width to 300-350px. If you plan on just keeping your sidebar in a 1-column orientation, you could set it smaller (200-250px is what I would recommend.)
You'll notice that while we're fiddling with these attributes, there's a live version of your blog below the Template Designer, showing you what you're doing as you go along. (NICE!)
Once you have widths you're happy with, click "Apply to Blog" (top right).
Blog Background/Wallpaper:
5. Now. Here's where you can really jazz up your blog by doing very little. We're going to add a background/wallpaper to our test blogs; something that you really love, something that says a little something about you.
But.
I'm going to preface this set of instructions with this: K.I.S.S.
Keep It Simple Sewist
Seriously. Don't go crazy here. And if you'd prefer to just have a solid color background, we'll go over that below. But this info I'm about to cover is for you, too.
The prettiest blogs have a very simple color scheme. Specifically, 2 - 3 colors. No more. Here are some popular blogs in our Quiltosphere:
 |
| image courtesy of Fresh Lemons Quilts Notice: background is a simple linen weave in tan. blog header is in teal, pink, and yellow. Three colors. |
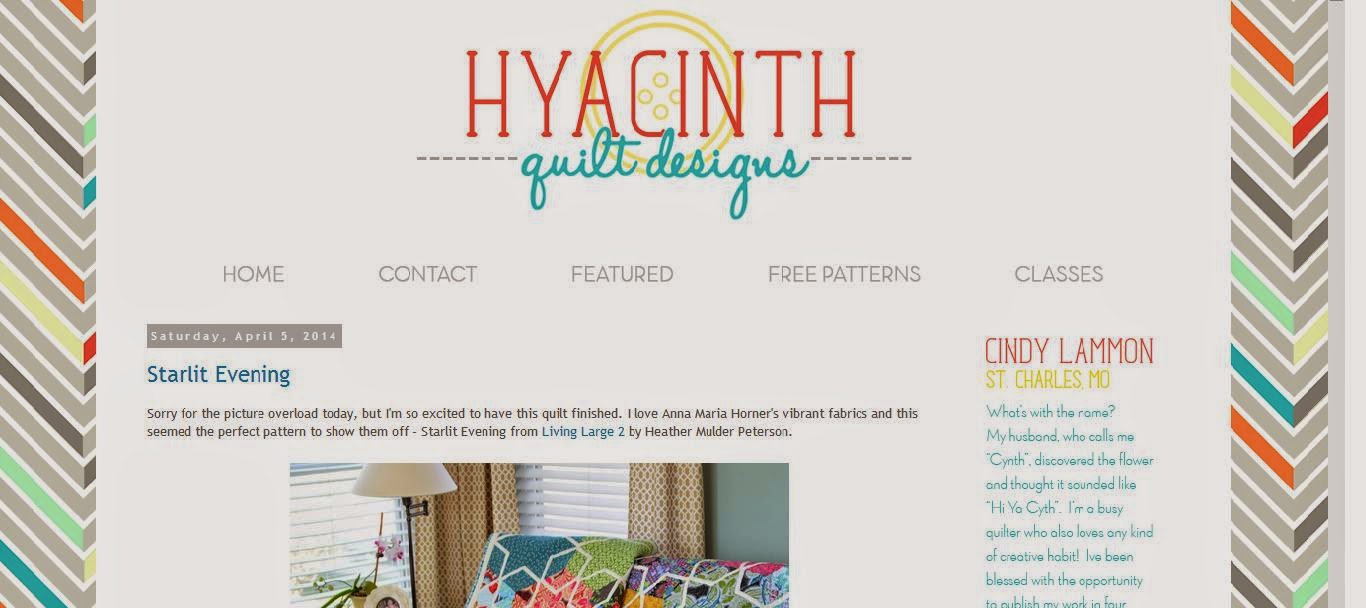 |
| image courtesy of Hyacinth Quilt Designs Notice: width of blog nice and wide, minimal background. Background is a simple chevron pattern. blog header is 3 main colors: orange, teal, yellow. |
 |
| image courtesy of Stitchery Dickory Dock Red and aqua themed blog. Again, notice the width of the blog - the background is a bit busier, but not at all overwhelming. |
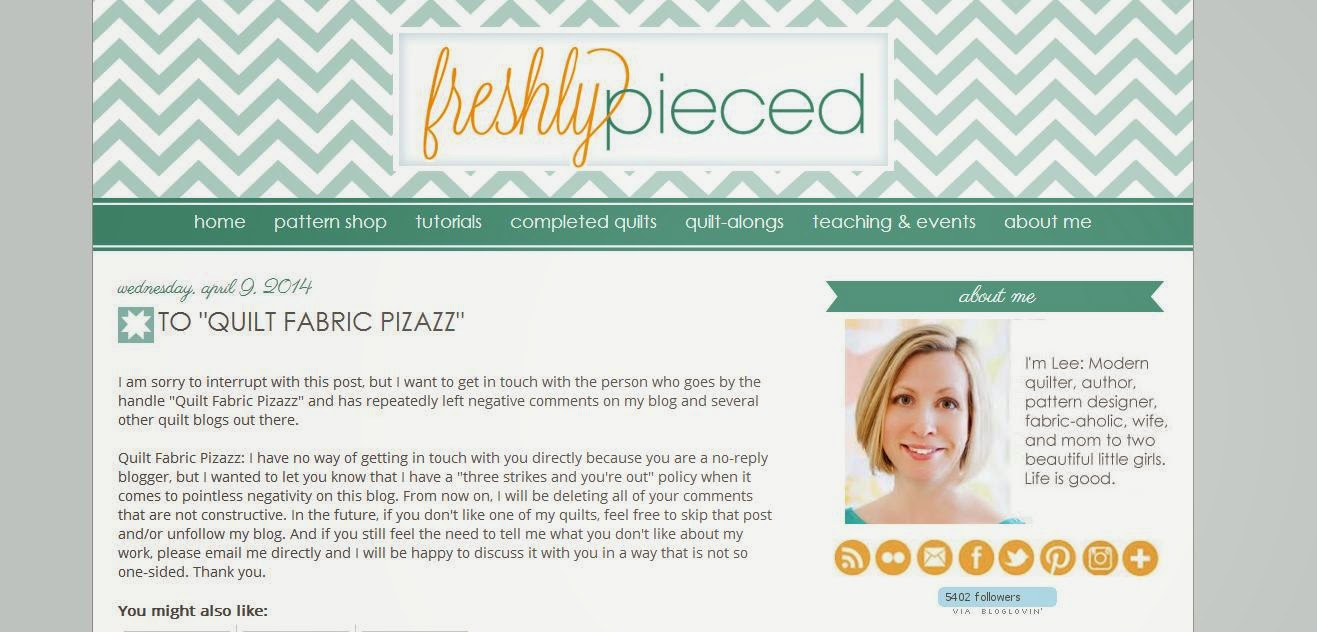 |
| image courtesy of Freshly Pieced background is solid grey, but she's patterned her header with a teal, yellow and white theme. 3 colors. |
Also notice that for these bloggers, the background matches the color scheme of their blog. When you click through to their sites, you think: "oh, that's pretty!" but it's not distracting. It's not a picture, but a really simple pattern.
A background is an accessory. It merely adds to the blog, it doesn't make the blog.
Keeping that in mind. Let's go searching.
Now, if you Google "Background Wallpaper" you'll come up with quite the plethora of royalty free downloadable images.
To spice it up a bit, I Googled "Background Wallpaper Vintage" and got a lot of pretty choices. Since I always seem to gravitate toward blues, I tried consciously to pick another color, and went with green.
Make sure that when you download your image that you make note of the website you pulled it from so you can give credit to that site on your site.
Uploading the image:
In your "Background" screen of the Template Designer, click the little drop down arrow beside the Background Image box

select Upload Image

You have a few options once the image is uploaded which you can play with in order to place the image where you like it, if the image is smaller tile it, or to have the image scroll with the page.
I:
deselect scroll with page
Tile
Align top left
....for this particular background. But play with it, see what you like. If you hover your mouse over the bottom portion of the window (showing your Test Blog) and roll your page down, you'll be able to see better how the background will look and act on your blog.

Setting a Solid Color Background:
1. Click "Advanced" tab left
2. Click "Backgrounds"

"Outer Background" select a color from the drop down menu to change the outer background
"Main Background" this is where your posts will sit. I recommend keeping your main background white; white competes less with photos, is easier to read text on, etc. And almost all of the most successful quilting bloggers have white main backgrounds.
That said, play with it a bit to see what works. Remember: K.I.S.S.
Once you're happy, click "Apply to Blog".
Giving Credit Where Credit is Due:
If you downloaded an image to upload as a wallpaper, we should give credit to that site.
This will be short, as we covered "Adding a Gadget" last week in one of the video tutorials (this will be the same as adding a blog button to the sidebar).
1. Head over to your Blogger.com homepage. Select your test/template blog.
2. Click in the dropdown menu beside your blog's name, click "Layout"
3. Scroll down to your Footers and select "Add a Gadget"

5. In the pop-up text box, leave the "Title" field blank. In the "Content" box, type:
Image courtesy of {name of website}.
6. Highlight the {website's name} with your mouse; click on the little world icon with the chain link on it. Another pop-up appears - here you'll paste the website address of the site you downloaded the image from.

8. Click Save.
9. You're brought back to the Layout page. Click "Apply to Blog".

Okay!
That's it for this week, folks. Here's the "before" and "after" of my test blog for this week's edits:
 |
| BEFORE |
 |
| AFTER |


11 comments
Great post!!
ReplyDeleteThanks Jane!! <3
DeleteAwesome, Erin!
ReplyDelete*blushes* thanks M-R!
Deletethis is so useful - thanks so much.
ReplyDeleteThanks Erin. I've often wondered how to get a pretty background on my blog. I'm assuming I could use one of my own images?
ReplyDeleteJust found your website via someone who had a project on WIP Wednesday. Your blog instruction are awesome and I want to keep up. so have just followed you with bloglovin. Thanks for such a clear post.
ReplyDeleteI'm glad you found me, Schulz Family! I hope you enjoy the series :)
DeleteThe information on how to update my blog is great. I am just a little worried I will lock myself out of my current blog like I did my original blog-YIKES I kind of get click happy without thinking. I like how you have photos of other blog colour schemes- good reference!
ReplyDeleteYou've already really helped me improve my blog and I can't thank you enough!!
ReplyDeleteThis has been a great help Erin - thank you.
ReplyDeleteI ♥ to hear from you!
Thank you for taking the time to leave a comment or for asking me a question. Rather email me? Reach out at sewathomemummy@gmail.com.
I like to email everyone back when they've commented - so if you're a no-reply blogger, make sure to leave your email address in your comment so I can share the love back atcha!