
Tips & Tricks Tuesday - Tutorial: Charm Pack Apple Core Quilt
10:00:00 PM
Welcome to Sew at Home Mummy, home of "Tips and Tricks Tuesdays: What would MacGyver do?"

This is how it works:
- Post a tip, trick or tutorial on your website or blog
- Grab a "Tips & Tricks" button from my blog in the right sidebar -->
- Post said button in your tricks post, and link back to my blog
- At the bottom of this post, click the "link up" button and follow the directions...let the party begin!
- If you have a chance, pop by the other fellow blogger linker-upers at the bottom of this post and share some love!
This is a tutorial on creating a charm pack apple core quilt - stroller or car seat (or little person) sized. Any tips for curved piecing that I've wanted to really emphasize for you are highlighted in blue.
Here's the Anatomy of an Apple Core for this tutorial, so you know what I'm talking about when I say "top" and "waist" of the core pieces:

Supplies:
- Small cutting mat; this way, you'll be able to spin the mat for cutting instead of moving your fabric.
- Small rotary cutter (18mm or 28mm); much easier to cut the small curves with a smaller rotary.
- Apple core template, charm sized; I picked mine up for about $5 (here: LINK)
- Charm pack or yardage; 1 charm pack will make a mini quilt about 20" x 24"; I'm using moda's Birds & Berries by Lauren & Jessie Jung.

I found I could stack 4 charms to cut comfortably.
Also, I highly recommend putting some of (this - LINK) on the back of your template so it doesn't slip and slide while you're navigating the curves.


Sewing:
Grab your first two pieces. The top of the apple core on one piece will sit in the waist of the apple core next to it. Match the marks on your fabric, right sides together, and put a pin in, like this:

Next, in the same pinning fashion, align both outside edges together, and pin.


Now, it's time to start sewing.
It doesn't really matter which side you sew facing up - i.e. if your apple core top is on top or the bottom. Whatever you feel comfortable with - that said, when you start piecing the rows together, you'll have to sew both ways (apple core tops and sides)...

- dropped my machine speed right down
- about every 4-5 stitches, adjusted my fabric, lifted presser foot, pivoted a bit, etc.
- made sure the fabric about to enter under the presser foot was nice and smooth, no bumps (which might indicate folded or bunched fabric underneath)
- left my pins in until the very last minute (without sewing over them - safety first!)
When you finally make it around that tight curve, this is what you'll get:

No matter what pressing technique I tried, I couldn't get these stinkin' seams to lay flat - pressing to the core top, pressing to waist, pressing the seams open, nothing would let them lay flat.
Until I remembered, from my dressmaking days: when you put a sleeve into a garment, often times you need to make little slits in the seam allowance in order for the curved bit to sit nicely in the garment.
I thought, what the heck, I'll give it a go. Make little slits in the seam allowance, all the way along the curve, about every 0.75", almost to the seam, like this:

So create a bunch of these 2-apple core units. Then you can connect 2 of the units to make a 4-core block.
Here's how you do that.
It's pretty much the same as creating the 2-core units, except now, you have a center seam to deal with.
First, align the two center seams, right sides together, and pin in the same manner as we did above (shallow and a teensy grab):


Clip seam allowance.
Press seams open.
The back of your beautiful 4-core block unit will look like this:

Sexy!!
Now, when I did my research for this quilt, a lot of the resources said to join the cores in long rows, and then join those rows together - much like you would with a conventional block quilt, like this:
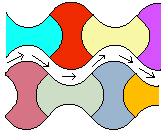 |
| Image from Quilter's Cache |
I did that with my first 2 rows, and trying to sew a long seam with these crazy, wonky curves was a nightmare; I knew I'd have to sew the rows together eventually, but I thought, heck, let's reduce how many long seams I'd have to do. Make my life a little easier. My solution?
Sew a 4-core block like this:

... then keep adding your 2-core units to the end of your block until you end up with the decided length of your rows (for me, 7 cores long), like this:

Now you have a few long rows instead of several (i.e. rows containing 2 x 7, instead of 1 x 7). Now, instead of having to sew 8 rows together, I'd only have to sew 4, like this:

Here's another tip. Starch is your BEST FRIEND in this tutorial. Ok, maybe not like your BFF the Pin, but a close second.
Before you start pinning your rows together - starch and steam and press the heckadoodles outta your pressed-open seams,

then flip that gorgeous row over and give'er the steam, starch and press from the front side - RAWR!

Now, stack two rows on top of each other, right sides together:

(another ridiculous pinning picture):


Anywho!
Get your top all pieced, then press and starch all of the seams open so everything lays nice and flat.
Then, layer and baste your quilt.
I chose to use minky, no batting. Ugh. What a nightmare minky is to quilt with. (personal opinion...)
Pin the heckadoodles out of it again. Minky, if you choose to use it, is very slippery and tends to roll at the edges...so leave yourself lots of extra on the sides:

Quilt.
Now. Most definitely use a quilting or walking foot. You would think that minky would glide nicely along that machine deck and feed dogs. Oh no, my friend! Not so.
I made the mistake of trying to free-motion quilt the thing, and it didn't work out so well, so here's a tip:
If you're planning on FMQ with minky, make sure that you are quilting with the minky side up - so when you baste your quilt, baste it upside down.
The minky increased the 'drag' drastically - it was really hard to push the fabric around under the darning foot with the minky side-down. Flip it over, and no problemo seniorita.
Because I had already basted the quilt right side up, I aborted all FMQ notions (silly Erin!) and went back to the good ol' stitch in the ditch method:

Oh, silly silly Erin! You have not learned your minky lesson, have you?
You BOUND your CURVED EDGE quilt with MINKY?!
(no wonder I almost became an alcoholic during this project...)
Create your binding:

Sew it on (I kept my walking foot on), and trim...


Now.
Picture this:
Out for our morning walk, the wee tike in the stroller and I her chauffeur. She decides, just as a massive gust of wind should stir, to kick her blanket off...and proceeds to laugh as it gets tousled like a tumble weed down the gross, wet street, mummy chasing after it like a mad woman, cursing under her breath.
No more, I thought.
The solution?
Clips, baby, CLIPS!
I attached these bad boys to the upper backside of the quilt so that I can attach them to her straps in the car seat or stroller and voila! Can't fly off anywhere!
I present to you, my esteemed readers, the "Quilt Saver":

And I apologize, I forgot to take pics of the process, but, here's how I attached them:
- Take a 10" strip of minky measuring 2.25" wide; sew, right sides together along long side of strip.
- Turn right side to outside.
- Cut long strip in half so you have 2 pieces, measuring about 5" x 1".
- Attach the mitten clip to one end by feeding end through slot, sew.
- Turn under unfinished end; pin to strip to blanket.
- Sew a nice rectangle at the bottom of the strip, attaching strip to blanket, leaving the end with the clip mobile/dangling, like so:


Minky makes a mess..... it's like it snowed purple all over my sewing room...
So a summary on my take on the apple core quilt blocks:
- If you've never sewn a curved seam in your life, I'd start with a larger sized apple core block - like one made for a layer cake, not the 4" one I did. Your blocks will go much quicker and the curves are relatively less severe with a larger template, therefore easier to navigate.
- If you're up for a go with the smaller template, here's my tip summary:
- Pin, pin, PIN!
- Slow and steady wins the race
- Clip your seam allowances and press seams open
- Starch, starch, starch!
- If you use minky, sew minky side up whenever possible and a walking foot is fantastic
The little one enjoying her new blanket:

Happy quilting!!


8 comments
Goodness - I almost want a drink just thinking about this project!!!! Pins! Minky! Curved Seams!! Oh my - the end result is awesome :) I also LOVE the wonder clips - they rock.
ReplyDeleteHahahah! Thanks Stacey! And yes, wonder clips are AMAZING!!! :D
DeleteFYI, A Curve Master foot set provides quick, pinless piecing of an apple core quilt. YouTube videos shows how to do it.
DeleteThanks Wenatchee!
DeleteI've never liked the Curve Master foot. I find it too obtrusive or something - but I know others who love it!
I'm a pinner for curves. I get much better results than any other technique I've tried - to each their own :D
I am with you on hating to pin. But this project sure looks like it needed it. This is why I'm afraid of sewing curves. Maybe just a little less afraid to try now that I've seen your tutorial. :p
ReplyDeleteGood! I'm glad! Now give it a go girl! :D
DeleteLove your tutorial - probably the funniest one I have ever read. Is heckadoodle really a word I wonder?? After making my huge (25") wagon wheel circle blocks, and pinning every 3/4" around the circle, I can appreciate many of your comments, although I didn't need to do quite so many of them. Making a bigger block means it is much easier to ease in the fullness, you don't really need to pivot or anything, and it presses out beautifully with no clipping.
ReplyDeleteLove your quilt! I too have a love hate relationship with pins:)
ReplyDeleteLet's say I wanted to do a binding with this quilt, how would I do that? Thanks!
I ♥ to hear from you!
Thank you for taking the time to leave a comment or for asking me a question. Rather email me? Reach out at sewathomemummy@gmail.com.
I like to email everyone back when they've commented - so if you're a no-reply blogger, make sure to leave your email address in your comment so I can share the love back atcha!