
Beautify your Blog: week 10 - Pictures/Photos
8:57:00 PMHi all and welcome back to the Beautify your Blog series here at Sew at Home Mummy.
This week we'll be going over pictures and photos in posts.
Please back-up your template before moving on to part 2 of this tutorial. Backing up your template was covered in Week 1 of the series. Each week builds on the previous week's modifications - I highly recommend starting at the beginning and moving forward.

1. Start Here
8. Sidebars (Pt 1)
9. Sidebars (Pt 2)
Tips for Posting Beautiful Photos of your Projects
1. Taking Gorgeous Photos
I'm not going to re-invent the wheel here; there are several articles on the web with tips and tricks for properly photographing your quilts and crafty projects. I'll list my favorite ones here, in no particular order:
**EXCELLENT** step-by-step source: Holly Knott - Shoot that Quilt!
How to Photograph your Quilts: Craftsy
IQA Tips for Good Photography
...all of this said, these are the ideal situations. I am guilty, 100%, of not following these guidelines. Either because of the inconvenience of the set-up, or because of my time. Or both. I do go to great lengths when I'm attempting to enter something into a show or challenge, but if it's just for my blog, I try to take the best possible picture I can at the time.
Shoot with a camera
I usually try to take my photos with a camera vs. my camera phone; the resolution is much higher on my camera and therefore the image quality is generally better.
Shoot Outside
...which, for most people who own homes, shouldn't be a problem. If you're in an apartment or rental (like me) it may be a little more difficult. Ultimately - try your best. If you can't shoot outside, try and aim for a set up like the one in the link above from Holly Knott - this is what I'm going to try my best to get set up for my upcoming submissions to Quiltcon.
Hang your quilt - don't hold it
Unfortunately, I don't have an area where we live where I can easily hang and photography my quilts outside - which is unfortunate to say the least - and they usually end up being held up by my husband while I take several shots. If you're shooting indoors, maybe pick a wall where you can set up a bracketed curtain rod or the like to hang your quilt while you shoot.
For blocks you're shooting, say, your works in progress, clear off the table or cutting mat around the block, and attempt to take the photo as square as possible to the block or object.
2. Posting Gorgeous Photos
I think most of us know how to upload photos to our blogs, but if not, it's the little icon circled in red in the picture below:

Maximize your photo size
did you know you can change the size at which your photos individually display? and, given that Quilter's blogs are essentially working and dynamic portfolios of our art, we should really be showcasing our images as the focus of our sites.
Therefore, we want to maximize the size at which they're displayed.
To do that, click on your image you just inserted into your post, and a pop-up appears, circled in red:

for your image display in most cases. If the resolution is poor on your image (a symptom of using a lower resolution camera, like a phone) your image may appear blurry maximized, so you may want to reconsider in this situation.
It's pretty rare that you'll want to post your images at Original size - this most likely will cause your image to be much wider than your posting space, and as such, will either impede on your sidebar or have part of your image cut off.
It's in this pop-up where you can also Add caption - for instance, if you wanted to add a descriptor of the image, or perhaps a link to the source of the image.
You can also change your image's justification to Left, Center, or Right. If you've made your image X-Large, though, you'll want to center justify so that it sits centered in your post.
3. Adding a Watermark to your Images
What is "Watermarking"?
Watermarking is adding your information (site name, web address, copyright) to your photos you post on your site, like this:

How to Watermark:
There are two ways to add watermarks to your images for free, using online software.
a) Batch watermarking.
Several images are watermarked all at once. Speeds the process, but you're limited to 5 or 6 font choices, and can't really customize where each watermark is placed on any given photo.
Just Google "batch watermarking online" and you'll come up with several online programs you don't need to download.
b) individual photo watermarking.
For this option, I'd use something like Pixlr.com/express - it takes a lot longer, but you can add custom text and add it to anywhere you like on the photo.
Why Watermark?
- Discouraging 'theivery' - if you're creating original graphics, wallpapers, etc., which are for sale, you'll need watermarks to prevent people from 'stealing' your graphics without paying for them.
- Reference - if someone's 'pinned' an image from your site, anyone will be able to find it's origin given that your site's address is right on the image.
- Copyright - self explanatory.
- Add some bling/personality. It's your way of putting your 'stamp' on your photos - probably one of the prettiest quilter blogger watermarks I've ever seen is Nicole's from "Mama Love Quilts". It's gorgeous - simple, mimics her blog header, and doesn't overwhelm her images:
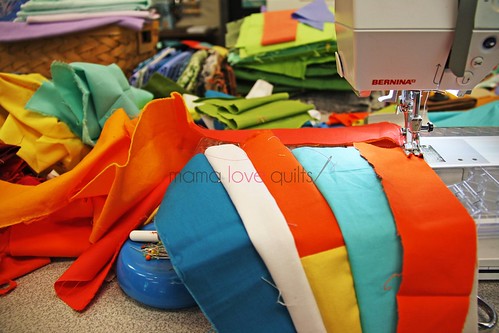 |
| image courtesy of Nicole @ Mama Love Quilts |
And as a side note, if you've never heard of or read Nicole's blog, you should. She is amazingly talented and her pictures are always to die for. Super inspiring.
Should you watermark?
Totally up to you. I used to watermark every image I posted - but let's face it - I just don't have the time any more. I *will* at some point start watermarking again, when I catch up with life. And then I'll come up with a custom, skookum one, like Nicole's. :)
Adding the "Pin It" Button to Your Images
Ever wonder how to add the Pin It button to your images on your site, so that when you hover over any given photo, the "Pin It" button appears, like so?:

Note: for some users of Chrome, the Pin It button may show without having installed it to your site - but you still need to add it to your blog, since a good percentage of your readership will be using other browsers, such as Firefox and Safari.
For example, here's my analytics on the browser ratio of users who peruse my site. These are my stats from yesterday (Monday, June 9, 2014):

So we need to make our images as 'pinnable' and sites as user friendly as possible - the viral nature of Pinterest is an awesome way to gain new readers and new interest in our blogs.
Here's the tutorial:
1. Go to The Widget Builder on Pinterest.com's site.
2. Set your Button Type to Image Hover

3. Set your Pin It button`s appearance - I set mine to the settings shown above.
You can hover over the image in the "Preview" section to see what your button will look like.
Once you're happy, scroll down the page and Copy the code in the grey box (to a Notepad file is usually what I do).

4. Head over to your Blogger.com homepage.
5. From the drop down menu beside your Blog's name, select Template.
ensure you have backed up your template before continuing.
6. Select Edit HTML.
7. In the HTML box which appears, single click anywhere in the box, so that you see your flashing cursor.
8. On your keyboard, press CTRL+F (pc) or CMND+F (Mac)
9. Type the following into the box which appears (circled in red):

</body>
and hit
ENTER
you'll see your code skip down, and highlight the text you just typed within the written code in yellow:

10. Directly above that body coding, insert the code you grabbed from Pinterest, like this:

remove the "async" word from the code before saving it.

""Preview" your blog before saving to make sure nothing has gone awry - because it's not a "live" version of your site, you won't see the actual Pin It button appear, but you'll know at least you haven't messed anything else up, lol.
Click "Save Template" once you're happy. View a live version of your blog, and you should now see a Pin it button when you hover!

Like my smiley? heheh
There you have it! Now everyone who visits your site (who is running Javascript, since this needs to be enabled to view the Pin it button) regardless of their browser will be able to see the button pop up when they hover on your images, making it that much easier to Pin you!
A Special Note On Pinning:
Make sure that when you pin an image, you pin from the POST and not the main SITE. I.e. - make sure your URL is not the main page URL but the URL specific to that post when pinning the pictures.
i.e.:
Pin from here:

NOT here:

If you're on the main page of a blog when you pin, if you go to click that image from Pinterest it'll guide you back to the main page of the blog - NOT the specific post which you pinned the photo from.
This mistake can be a real headache when you're pinning something specific, like a tutorial - you would have to search through the person's blog.
In order to pin from the post's specific page, just click the post's title. Then when you pin the images, they'll be associated with that specific URL.
Self-Promoting Pinning
When you've finished a project, make sure to remember to pin it to your Pinterest boards. It's a great way to increase traffic to your site, and another form of social media in which to promote yourself.
As always, I love to see your blogs as you work on them - leave me the link in the comments section!!
That's it for this week! I hope you're still enjoying the tutorials. My apologies for this one being a little later today, I'm sorry - my neck has been really sore (I keep putting it 'out') and I've been in a mad rush to try and finish things for my sister in law before her baby shower (which, truth be told, is not helping my neck, heheh).
Thank you SO much for all of the kind emails and comments earlier today, I really felt the love :) You guys are so awesome!! And don't worry about me, takes more than a kink to hold me down ;)
Happy blogging, Quilty Peeps!


2 comments
Thank you for sharing the Pinit tutorial! I have wondered how to do it, and your instructions made it easy for me!
ReplyDeleteIt's funny, I used to have the Pin It feature on my photos but I just realized that it's not there anymore. I know I did it a different way (don't recall how right now) so I'll have to see about re-doing it. Also, an easy way (for Mac users) to add a watermark is to do it in Preview. You go to the Tools dropdown and select Annotate -- text. Then you type what you want and hit save. That's how I do mine now. it also allows me to use the same font as my blog header.
ReplyDeleteI ♥ to hear from you!
Thank you for taking the time to leave a comment or for asking me a question. Rather email me? Reach out at sewathomemummy@gmail.com.
I like to email everyone back when they've commented - so if you're a no-reply blogger, make sure to leave your email address in your comment so I can share the love back atcha!