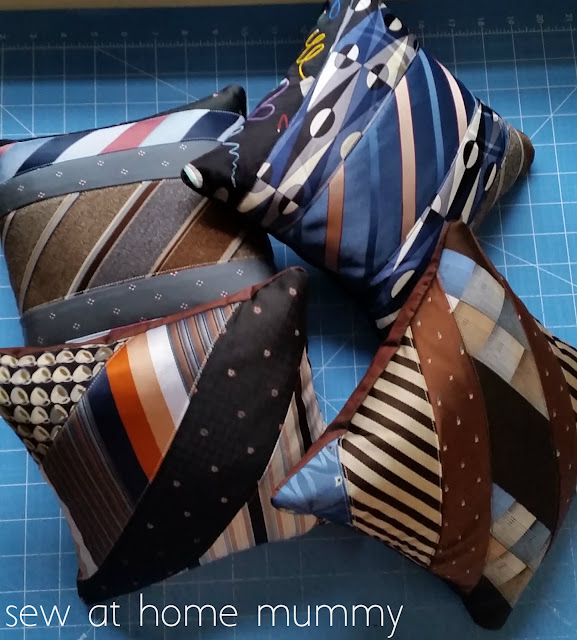
TGIFF: Keepsake Quilted Tie Pillows
8:00:00 AMThis week I finished up another commission project for a friend.
I have decided that 2016 (and 2017, for that matter) will be the year of saving. Saving for a longarm/midarm. I'm a woman on a mission.
So - I've been working hard at making money (I wrote up my 'techniques' on how I do that as a stay at home mom in this previous post) - offering my services to friends and relatives, plugging away at my Etsy shop, and squirreling away gift cards from doing online surveys (don't laugh - I make good coin at it...).
One of the projects I've been really lucky, and honored, to create was a commissioned set of pieced and quilted tie pillows for one of my friends from her dad's old ties. A way she and her siblings could remember him by.
It was fun to work with a different textile; and even more fun when she told me not to wash out the coffee stains and food remnants - all the more to remember her dad by.
Very cool.
Also very unnerving cutting into someone's memories. Oy.
But they turned out well; this set are 10x10; earlier in the summer I made another 4, almost double the size, and they turned out well too.
They are backed with a silk, chosen by the customer.
The recipient wanted me to cut the ties open, remove the interfacing, and cut the ties into smaller strips - unlike other tie pillow tutorials out there.
I used a QAYG (quilt as you go) method to assemble the fronts, stitching the cut tie strips onto a batting and Osnaburg foundation.

Sew at Home Mummy Tip:
Ties are cut on the bias - therefore very stretchy, and wriggly!
When using the QAYG technique use plenty of pins or a quick spray of quilt basting spray to keep the pieces from shifting as you piece.
I placed YYK zippers in a side seam on each of the pillows.

Sew at Home Mummy Tip:
For puffier pillows, make smaller covers.
Make your cover 1/2" - 1" smaller square than your form/insert.
These covers are 9" square for a 10" form.
Pillows are off to be with their new owner(s) now! Today I'm linking up with Thank Goodness it's Finished Friday!
This week TGIFF is being hosted by M-R of Quilt Matters - head on over there and visit her linky-party, and check out what she and others have been up to!
**And, as a side note - check out my post {HERE} for a GIVEAWAY! for Sew Mama Sew Giveaway Day!!**


3 comments
Oh Erin, I love these! What a great idea to memorialize a special someone! I'm itching for a longarm too. Good luck! I know you'll have one before you know it!
ReplyDeleteOh, well done!!! My dad has a bunch of ties that I want to make something for me and my daughters, but I want to include his dress shirts! He won't buy anything new clothing-wise, so he is using everything until it is totally thread-bare! I'll be using his suits too (he still wears a suit whenever he leaves the house)...t 94.5 years old, nothing is going to change him!
ReplyDeleteThese are fabulous. Beautiful work. Thank you for sharing.
ReplyDeleteI ♥ to hear from you!
Thank you for taking the time to leave a comment or for asking me a question. Rather email me? Reach out at sewathomemummy@gmail.com.
I like to email everyone back when they've commented - so if you're a no-reply blogger, make sure to leave your email address in your comment so I can share the love back atcha!